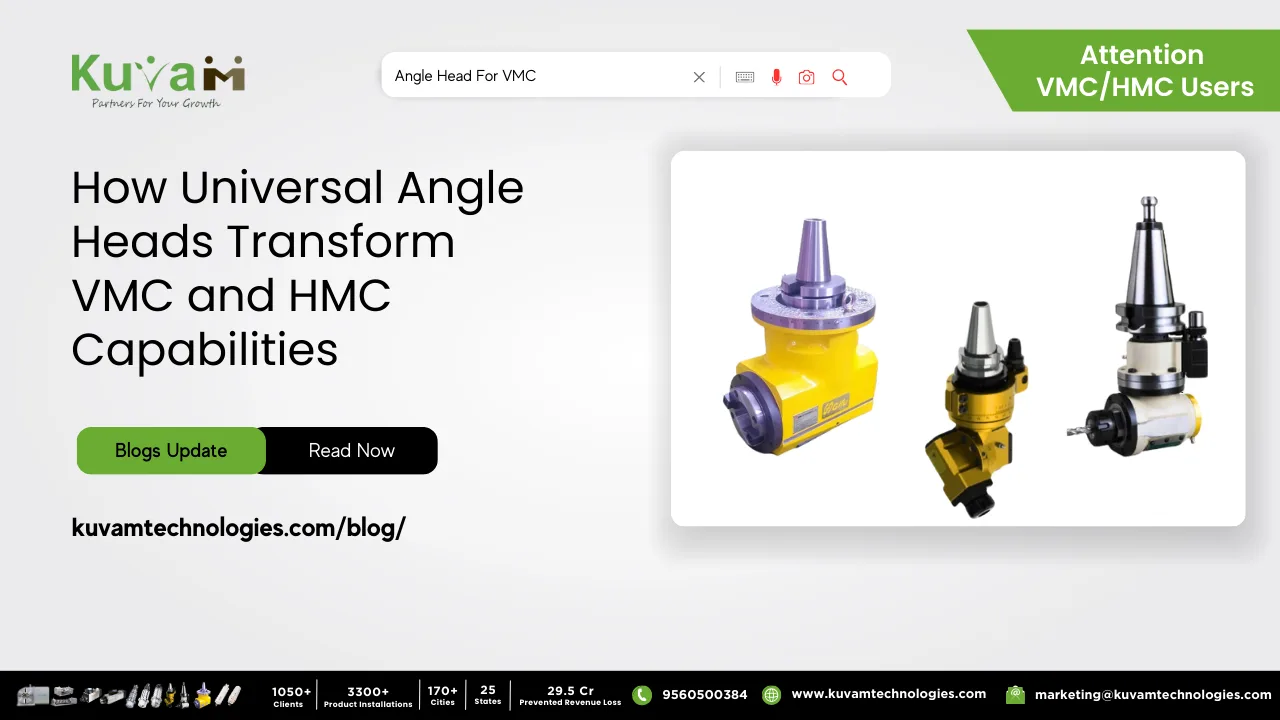
When working with an angle head, proper alignment and setup are crucial to avoid machining errors that can affect the quality and precision of your work. Here’s a comprehensive guide to ensure you’re on the right track:
- Read the Installation Procedures in the Instruction Manual
Before you begin any setup, thoroughly read the installation procedures outlined in the instruction manual. This step is essential for understanding the workings of the angle head and ensuring you have all the necessary information to proceed correctly. Familiarizing yourself with the manual will provide insights into the specifications, adjustments, and maintenance requirements specific to your angle head.
- Follow the Steps Carefully
Once you have a good understanding of the installation procedures, it’s time to follow the steps meticulously. Here’s a detailed breakdown of what to do:
Step 1: Prepare Your Workspace
- Ensure your workspace is clean and free from any obstructions.
- Gather all the tools and materials required for the installation.
Step 2: Mount the Angle Head
- Attach the angle head to the machine spindle or turret securely.
- Use the appropriate mounting hardware as specified in the manual.
Step 3: Align the Angle Head
- Align the angle head to the spindle centerline using precision measuring instruments.
- Adjust the angle head until it is perfectly perpendicular or at the desired angle to the workpiece.
Step 4: Tighten and Secure
- Once aligned, tighten all bolts and screws to secure the angle head firmly in place.
- Recheck the alignment after tightening to ensure it has not shifted.
Step 5: Perform Preliminary Checks
- Check for any visible misalignments or loose components.
- Ensure that all safety guards and covers are in place.
- Prepare a Post-Installation Checklist
Although you haven’t prepared a checklist after the installation yet, it’s a good practice to create one to ensure you don’t miss any critical steps. Your checklist might include:
- Confirming that all bolts and screws are tightened.
- Verifying the alignment with precision measuring tools.
- Checking for any unusual noises or vibrations.
- Ensuring all safety features are operational.
- Check Vibration and Runout at 100 RPM
After installation, it’s crucial to check the vibration and runout of the angle head at 100 RPM. This step will help you identify any potential issues that could affect the machining process.
How to Check:
- Start the machine and set the speed to 100 RPM.
- Observe the angle head for any excessive vibrations or wobbling.
- Use a dial indicator to measure the runout and ensure it is within the acceptable tolerance range.
Troubleshooting:
- If you detect significant vibration or runout, stop the machine and recheck the alignment.
- Tighten any loose components and remeasure.
- Consult the instruction manual for troubleshooting tips specific to your angle head model.
By following these steps and conducting thorough checks, you can ensure proper alignment and setup of the angle head, leading to more accurate and efficient machining. Remember, careful preparation and attention to detail are key to avoiding errors and achieving the best results in your machining projects.
Ensure Precision in Your Machining Today! Ready to improve your machining accuracy? Follow our detailed guide and achieve perfect alignment with your angle head now! Contact us now 9560500384 or email us on marketing@kuvamtechnologies.com